How to create a SCRUM Board for your startup?

Before Coming to the topic of how to set up a Scrum Board, it's very important to understand what a Scrum Board is. A Scrum board is a visual to-do list used to manage and monitor tasks in an ongoing sprint.
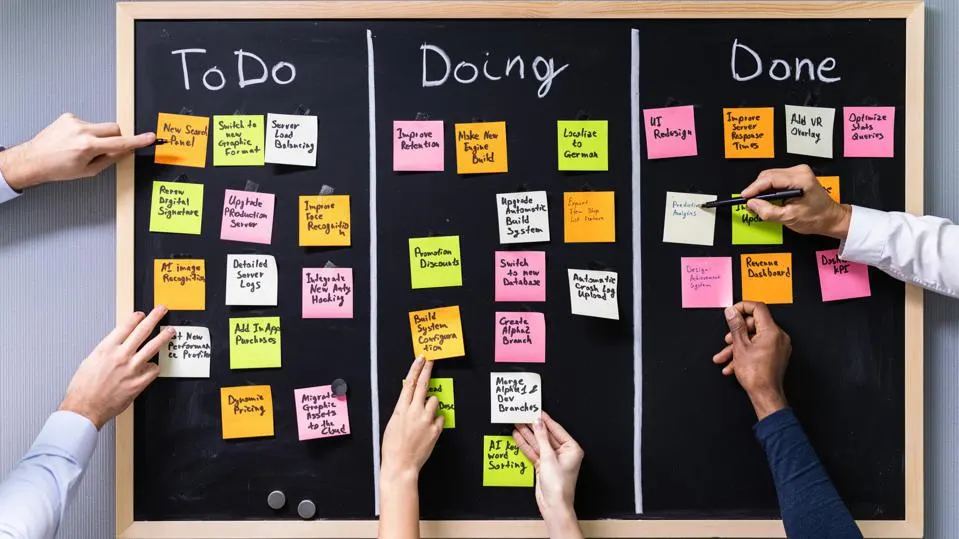
It consists of columns that represent the different stages of a workflow (e.g. To Do, In Progress, Complete). Each column has rows that represent individual tasks or work items. Tasks are broken into small, manageable pieces and moved across the board from left to right to show progress.
Teams use Scrum boards in sprint planning meetings to populate tasks for the upcoming sprint. They also update the board daily in standup meetings to show work completed.
With a synchronized view of all tasks on a single page, the Scrum board manager can visualize how tasks are moving along, clear backlogs, if any, and troubleshoot in real-time to adhere to project deadlines.
This helps Scrum team managers update progress and keep everyone productive, accountable, and on track with the overall project objectives.
Scrum boards are highly versatile. They can be customized to fit each project’s requirements. But to develop a tailor-made Scrum board for your entire team, you’ll need a grip on the absolute essentials of the Scrum framework!
Components of a SCRUM Board:
Columns: The board is divided into columns that represent the various stages of the project workflow. Common columns include:
Backlog: Contains tasks or user stories that have not yet been started.
To Do: Tasks that are ready to be worked on.
In Progress: Tasks that team members are currently working on.
Review: Tasks that are completed and awaiting review.
Done: Tasks that have been completed and approved.
Cards or Sticky Notes: Each task or user story is represented by a card or sticky note on the board. These cards contain information such as the task description, assignee, and any relevant details. Team members move these cards across the columns as they progress through the workflow.
Visual Signals: Scrum boards often use visual signals such as colours or icons to convey additional information about tasks, such as priority level, task type, or blockers.
Team Collaboration: The Scrum board serves as a central point for team collaboration, allowing everyone to see the status of tasks and identify any bottlenecks or dependencies.
Transparency: By making the project workflow visible to everyone on the team, the Scrum board promotes transparency and helps ensure that everyone is aligned on the project's progress and goals.
Setting up a Scrum board for a startup involves several steps to ensure it aligns with the specific needs and dynamics of the team. Here's a guide on how to do it effectively:
Understand Your Team's Needs:
Before setting up the Scrum board, understand the size of your team, their roles, the nature of projects, and the workflow.
Identify the key stakeholders and understand their expectations from the Scrum board.
Choose the Right Tools:
Select a physical or digital board based on your team's preferences and constraints.
Popular digital tools include Jira, Trello, Asana, and even specialized Scrum tools like Scrumwise.
Define Columns:
Common columns on a Scrum board include Backlog, To Do, In Progress, Review, and Done.
Tailor these columns to match your team's workflow. For example, if you have a separate testing phase, you might include a "Testing" column.
Create User Stories and Tasks:
Break down your projects into user stories, which represent features or functionality from the user's perspective.
Convert these user stories into actionable tasks that can be completed within a sprint.
Prioritize User Stories:
Prioritize user stories based on their importance and dependencies.
Place high-priority stories at the top of the Backlog column.
Assign Tasks to Sprints:
Plan your work in sprints, typically 1-4 weeks long.
Assign user stories and tasks from the Backlog column to the current sprint.
Hold Sprint Planning Meetings:
Conduct sprint planning meetings at the beginning of each sprint.
Review the Backlog, select user stories for the sprint, and break them down into tasks.
Ensure everyone understands the sprint goal and their individual responsibilities.
Update the Board Regularly:
Encourage team members to move tasks across the board as they progress.
Use daily stand-up meetings to discuss progress and update the board accordingly.
Review and Retrospective:
At the end of each sprint, hold a sprint review meeting to demo completed work and gather feedback.
Conduct a retrospective to reflect on what went well, and what could be improved, and make adjustments for the next sprint.
Iterate and Improve:
Continuously evaluate and refine your Scrum board and processes based on feedback and lessons learned.
Adapt the board to accommodate changing project requirements and team dynamics.
Remember that the Scrum board is a visual representation of your team's work and progress. Keep it updated, transparent, and aligned with your goals to maximize its effectiveness in managing projects and fostering collaboration within your startup.
How to Create User Stories?
before talking about creating a user story we need to understand, what is a user story? A user story is a small unit of work in an Agile workflow. It is a short, written explanation of a particular user’s need and how it can be fulfilled. There is no room for jargon in a user story. It is written in easily accessible language to provide a clear picture of what the user requires. The technical details can be discussed at a later stage.
When writing a user story, remember that user stories follow a standard template:
"As a < type of user >, I want < some goal > so that < some reason >."
Here are a few examples of user stories:
As a site member, I can fill out an application to become a Certified Scrum Trainer so that I can teach Certified Scrum Master (CSM) and Certified Scrum Product Owner (CSPO) courses and certify others.
As a trainer, I want my profile to list my upcoming classes and include a link to a detailed page about each so that prospective attendees can find my courses.
As a site visitor, I can access old news that is no longer on the home page, so I can access things I remember from the past or that others mentioned to me.
As a site visitor, I can see a list of all upcoming “Certification Courses” and can page through them if there is a lot, so I can choose the best course for me.
Creating user stories for a Scrum board involves breaking down features or requirements into small, manageable units of work that provide value to the end-users. Here's a step-by-step guide to creating user stories:
Identify User Roles: Understand who will be using the product or system. These are your end-users. Identify different types of users or personas who will interact with the product.
Define Goals and Objectives: Understand the goals and objectives of the project. What problem is the product solving? What are the key features or functionalities needed to address these goals?
Brainstorm Features: Collaborate with your team to brainstorm potential features or functionalities that will address the identified goals and objectives. These features should directly benefit the end-users.
Write User Stories: Use the following template to create user stories:
As a [user role], I want [feature/functionality] so that [reason/benefit].
For example:
As a registered user, I want to be able to reset my password so that I can regain access to my account if I forget it.
As a customer, I want to be able to filter products by price so that I can find items within my budget easily.
Break Down User Stories: User stories should be small enough to be completed within a single sprint (typically 1-4 weeks). If a user story is too large, break it down into smaller, more manageable tasks.
Prioritize User Stories: Prioritize user stories based on their importance to the project and the value they provide to the end-users. You can use techniques like MoSCoW prioritization (Must have, should have, could have, Won't have) or the Fibonacci sequence (1, 2, 3, 5, 8...) to prioritize stories.
Estimate User Stories: Estimate the effort required to complete each user story. You can use story points, t-shirt sizes (XS, S, M, L, XL), or other estimation techniques.
Create Tasks: Once user stories are prioritized and estimated, break them down into individual tasks or sub-tasks that need to be completed to fulfil the user story.
Visualize on Scrum Board: Transfer user stories and tasks onto a physical or digital Scrum board. Use columns to represent different stages of the development process (e.g., To Do, In Progress, Done). Move user stories and tasks across the board as they progress through the workflow.
Iterate and Refine: As the project progresses, revisit and refine user stories based on feedback, changes in requirements, or new insights gained during development.
By following these steps, you can effectively create user stories for your Scrum board that align with the goals of the project and provide value to the end-users.
Conclusion:
Creating a SCRUM board can provide clarity to the team and divide a bigger task into actionable components thus making management and development easier. Following certain rules while making a SCRUM board that are mentioned above can expedite your process.
As a startup, SCRUM board might seem like a time-consuming task but the gain in efficiency and clarity is worth the time invested!
https://www.forbes.com/advisor/business/what-is-a-scrum-board/
https://clickup.com/blog/scrum-board/
https://www.wrike.com/agile-guide/user-stories-guide/
https://www.mountaingoatsoftware.com/agile/user-stories
https://unsplash.com/photos/sticky-notes-on-corkboard-5aiRb5f464A


